
In a nutshell, live chat enables you to provide a better level of customer support. What’s more, it can also help your visitors feel more engaged since they know you’re just a click away. In this article, we’ll get to know the excellent WP Live Chat Support plugin, how to set it up, and how to operate it. Let’s get busy!
Introducing the WP Live Chat Support Plugin

The WP Live Chat Support plugin enables you to communicate with your clients and visitors via chat, with very little setup necessary. It boasts an easy-to-use interface for both users and agents, and it even enables you to save your conversations. That way, you’ll be able to reference old chats and help users more efficiently. What’s more, it plays incredibly well with Divi, and we encountered no issues during testing.
In this article, we’ll focus on WP Live Chat Support’s free version, but there’s also a premium version available. The plugin’s free version is more than powerful enough for small to medium sites, and – in our opinion – it might not be worth upgrading until you reach the point where you need more than one agent.
Before we move on, it’s worth noting we’ve covered other WordPress live chat alternatives in the past, such as Zendesk Chat. However, we decided to go with WP Live Chat Support for this piece since it’s one of the most comprehensive options that doesn’t rely on a third-party platform.
Key Features:
- Supports an unlimited number of simultaneous live chats.
- Provides agents with detailed visitor information.
- Records conversations for record-keeping purposes.
- Offers a fully customizable live chat box.
- Notifies agents whenever a user begins a conversation.
- Integrates with Google Analytics.
Price: FREE | More Information
How to Set Up the WP Live Chat Support Plugin (In 3 Simple Steps)
Most of you are probably capable of installing WordPress plugins in your sleep, so we’ll skip right over that step. However, do remember to back up your WordPress installation before diving in using a solution such as UpdraftPlus – after all, you’ll be thankful for it if the worst happens!
Step #1: Configure Your General Settings
As soon as you enable the WP Live Chat Support plugin, two things will happen: a small live chat box will appear on your website, and a new tab will be added to your WordPress dashboard. Before we play with the former, let’s explore the latter.
Click on the Live Chat tab on your dashboard, and choose the Settings option. Here, you’ll find a wide range of options for configuring the plugin. For now, we only need to focus on the General Settings tab:
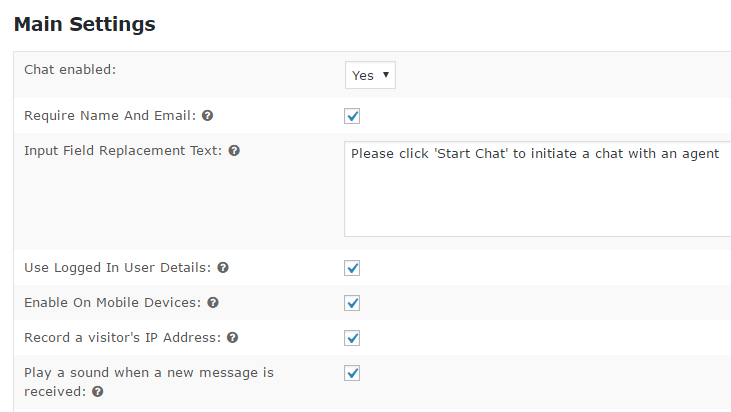
Most of the options here are fairly straightforward. You can choose to disable live chat, select whether users should provide contact information (which is always a good idea), and the message your input field should include.
Other advanced settings include the option to see user details if they’re logged in, the ability to record IP addresses, and the option to play a notification when someone sends a new message. All of these options are on by default, and there’s no harm in keeping them enabled.
Most importantly, keep an eye out for the option to enable live chat on mobile devices. Smartphones are a burgeoning source of traffic nowadays, so disabling this option may hinder your customer relationships.
Finally, the plugin also enables you to track your live chat statistics using Google Analytics:
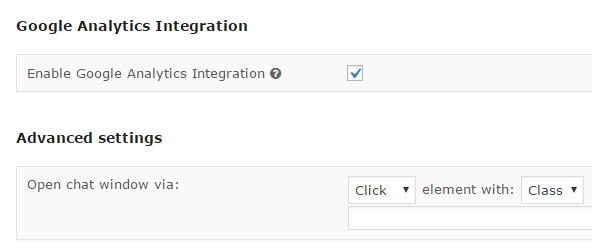
For this feature to work, your WordPress site should already be configured to work with Google Analytics. If you’re unsure how to do this, there are several methods to get you there. Pick the one you’re most comfortable with, then enable the corresponding option in the General Settings tab for WP Live Chat Support.
Step #2: Optimize Your Message Settings
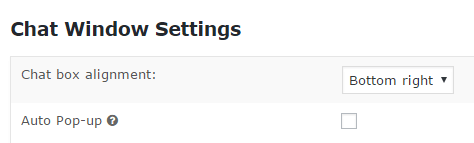
Moving on, click on the Chat Box tab right below General Settings. This section includes a variety of customization settings – several of these are only available for premium users, but the basic options are still suitable.
Firstly, you can decide on the location of your live chat pop-up box. In most cases, we’d recommend that you stick to the default location (bottom right) since the others can be a bit awkward, but your mileage may vary. You can also enable an option for the box to expand automatically, which should be avoided for usability reasons:
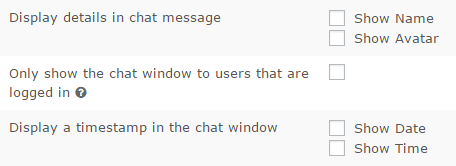
The plugin can also be configured to display users avatars and usernames if they’re logged in, which can be useful if you need to follow up at a later date. You can also disable live chat for users who aren’t logged in. However, we’d recommend against since you want to reach as many potential clients as possible.
Finally, you can set the live chat to display timestamps on your messages, which helps with record keeping. You can then access any past conversations from the History tab, and know exactly during which time of the day they took place:
Aside from these settings, WP Live Chat Support also enables you to receive messages while offline. The process is as simple as it sounds – if you aren’t online when a customer sends a query, you’ll get a notification as soon as you return to the dashboard.
Step #3: Start Chatting With Your Customers
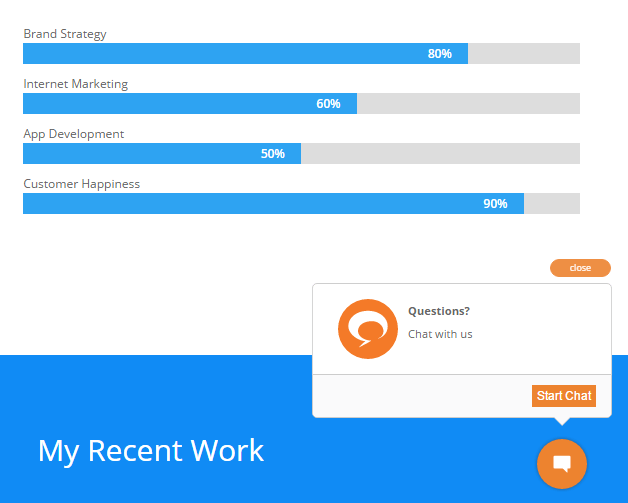
This plugin comes with a wealth of customization options, but not at the expense of usability. As soon as a visitor enters your site, they’ll see a small chat icon floating in the bottom right-hand corner (as long as you kept to the default location). In the example below, you can see the live chat box working on a page built using Divi:
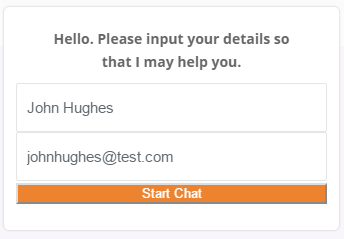
Clicking on the icon will prompt users to enter their name and email:
Once they click on Start Chat, the plugin will notify you there’s a user waiting for your reply. If you enabled the option to play a notification sound under General Settings, be warned – it can get very loud. The plugin will also request your permission to send you browser notifications once you receive your first message.
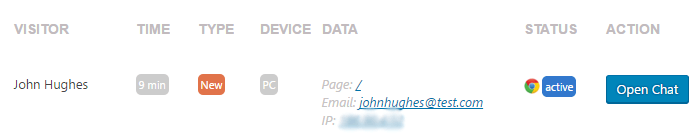
To reply to your visitor, head to the Live Chat tab and click on the Open Chat button next to their name:
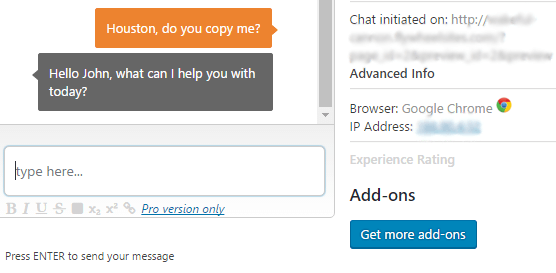
The following window will display any available information about your visitor, and enable you to talk with them for as long as you like:
Congratulations, you enabled live chat on your WordPress site!
Conclusion
Keeping your guests happy should always be a priority. Usable contact forms and thorough documentation can go a long way towards enabling users to help themselves, but both of these options lack the personal touch of live chat.
Setting up WordPress live chat is remarkably easy if you’re using a plugin such as WP Live Chat Support. In fact, it can be done in three short steps:
- Install the plugin and configure your general settings.
- Optimize your message settings.
- Begin chatting with your customers!
Article thumbnail image by vladwell / shutterstock.com